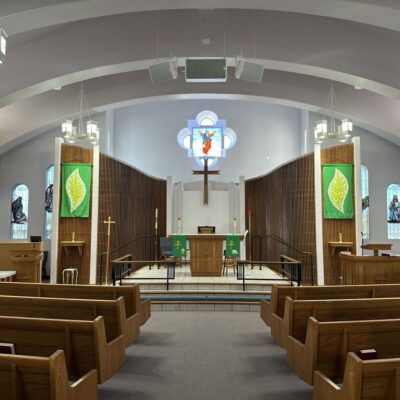
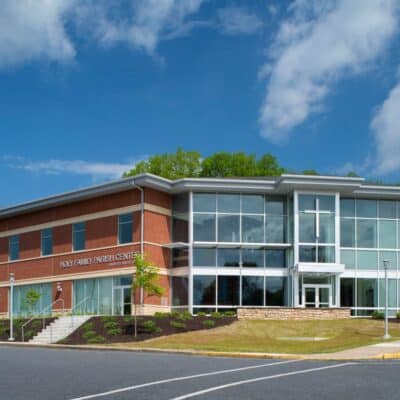
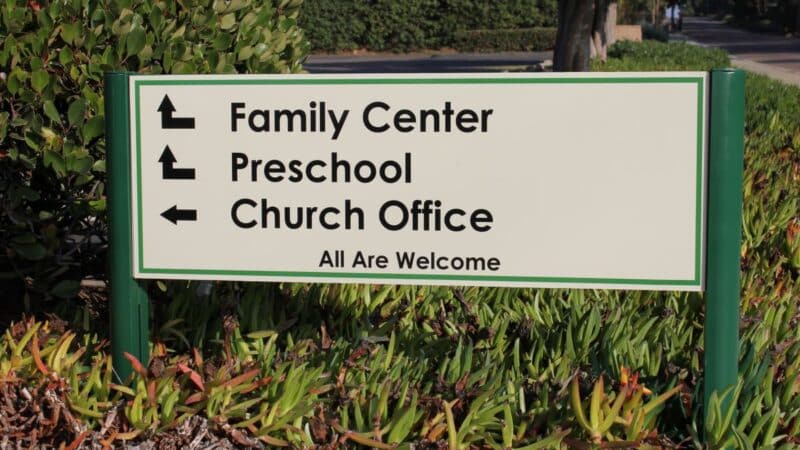
Home About CSP In Every Issue Blog Archives Buyer's Guide Media Guide e-News Subscribe Contact
Check Out The
February 2012 Supplement


How to Mic a Choir
By: Gene Houck

Often the biggest microphone challenge that a house of worship can have is with the choir. Issues include where to place the mics, how many mics to use, how much gain can you get before feedback, what type of mics to use--on and on it goes. Whether you hang the mics in a more permanent fashion or place them on boom stands, there are some basic guidelines to follow.

Mic Patterns
Cardiod (heart-shaped), SuperCardiod or HyperCardioid pattern microphones are the mic patterns of choice. A Cardiod pattern will not pick up much sound from directly behind the mic, and, when used, they will reduce congregational noise and unwanted instrumentation that may, in some cases, be positioned in front of the choir. SuperCardiod and HyperCardiod mics have a tighter pattern and can be especially useful to reduce unwanted sounds or instruments bleeding in from the sides. They can also be helpful when using multiple mics.

Mic Types
Since you must be able to pick up voices that are 6 to 10 feet away, you will want to use a condenser microphone for a choir instead of a dynamic microphone. Condensers are usually more expensive than dynamics, but they have a flatter frequency response and much greater output than dynamics (usually 10 – 15 dB higher output), giving greater performance from a distance. An added benefit is that condenser microphones will produce a higher signal-to-noise ratio (lower hiss or noise) and a better dynamic range.  This will be particularly noticeable if you are recording your choir performances.

Due to the electrical charge required by the microphone’s elements, condenser microphones must be powered by either batteries or, more commonly, by “phantom power” from a mixing board (almost always included with newer mixing boards) or other external power source.

Mic Number
When it comes to the question of how many microphones you should use, the simple rules is less is more. Believe it or not, every time the number of microphones on the choir doubles, the maximum gain-before-feedback will drop 3 dB. To reduce the gain-before-feedback, try to get closer to the sound source and use as few mics as possible. 

A good rule of thumb is to use one mic for every 20 to 25 feet the choir is wide. A good quality cardioid condenser will pick up to 20 to 25 people, so two condensers can cover most average size groups up to 50 singers, three condensers can cover up to 75 singers, and so on. Sometimes there are unusual choir shapes due to area constraints that warrant three or four mics when you may ordinarily use just two.

Mic Placement
Many of today’s contemporary worship services are staging the worship platform different from week to week, giving rise to more use of condensers on boom stands (platform condensers) instead of permanent installations (hanging choir mics).  The concern of not having mic stands and cable on the platform has given way to the practicality of being able to move the choir mics on the platform as is needed on any given worship service. 

Although there has been this developing trend towards platform condensers, the traditional hanging choir mic still remains (at least for now) the most popular choir mic of choice. This can be due to line-of-sight issues, the stationary makeup of the choir and just, well, what a church is used to doing. A few of these hanging mics can be hung over the choir from the ceiling or rafters and do a very good job  One of the challenges of hanging mics is that they quite often are positioned further away than where a condenser on a boom stand may be. 
 
Place the mics 18 inches to 3 feet in front of the first row. Adjust the height of the mic to 18 inches to 3 feet (match the distance of the first row) above the tallest singer in the back row.  Point the mics to just above the mouth of the tallest singer in the back row. This enables the mics to be equidistance to all the singers and helps to eliminate the front row from overwhelming the mix.
 
To better visualize this, think of the most sensitive part of the mic. That would be directly in front of the mic. Vocalists in the back row are singing directly into the microphone's most sensitive side (front, on-axis).  Vocalists in the front row are definitely closer to the microphone; however, they are also farther off-axis, so the microphone is less sensitive. Therefore, the microphone picks up the front and back row voices at about the same volume. You can also use this principle for a small group of vocalists. For example, if you had six vocalists with one microphone, you would put your weakest vocalist “on-axis” in front of the mic and your weaker vocalists “off-axis.” The result would similarly be an equal volume with all vocalists.

When equipping an area with multiple microphones, you must take care to avoid a phenomenon known as phase cancellation. Since sound travels in a wave, two microphones amplifying the same sound source can be hit by a different wave. By themselves, it is fine, but when combined in a mixer, the positive wave from one signal can cancel out, totally or in part, the negative phase of another signal. The usual result is a dropout of certain frequencies. This is referred to as “comb filtering” because the dead spots or “notches” missing in the frequency response.

To avoid this, always utilize the 3:1 rule. Multiply the distance of the sound source to the microphone by three. Simply put, that is the distance the two microphones need to be from each other. Most choirs do not exceed four rows. In extremely large choirs with six or more rows, you will need to divide sections and hang or boom mics in two vertical sections. The mic for the first sections would point just above the mouth of the tallest singer in the middle row, while the mic above would be pointed just above the mouth of the tallest singer in the back (6th or highest row).

Using a Single Mic for Each Vocalist
Believe it or not, there are some engineers that espouse the firm belief that with a conservative sized choir up to 20 to 25 voices it is best for everyone to have their own mic. First of all, you better have a large mixing console and be prepared for some mixing nightmares. Generally speaking, a choir should sound like a choir with a blend of voices.  In keeping with that idea, “area miking” (as we have been describing) with condensers will produce a better group feel. If, however, you have a few “step outs” where you feature a particular singer or singers while the choir is still singing, then having a couple of handheld dynamic mics positioned on their own stands a couple feet from the front row can allow a featured vocalist (in the front row) to “step out” and into the dynamic mic and clearly be featured.

In today’s contemporary churches, it is very common for there not to be a choir but instead a praise team of vocalists up to eight people strong. In this case, yes, individual mics are preferred. There can be some “phase cancellation” issues when vocalists are lined up so close to each other and mics are picking up not only the desired prime vocalist but the adjacent singer(s). Reversing the polarity of every other microphone (for example, mic 2, 4, 6 and 8) will minimize this phase cancellation effect. Many mixing consoles have a polarity reverse switch on each input. If not, and you are handy with a soldering gun, you can change the polarity of a microphone by exchanging wiring on pin 2 and pin 3 of the input connector (going into the console). Usually the white or red wire is on pin two (positive), and the black wire is on pin three (negative). The advantage you will have is more gain in the house speakers as well as the monitors.

Monitor Considerations
If you are supplying the choir with a monitor feed, try not to send them a mix of the choir. For one thing, it will make them sing softer, which is generally not desired, plus it increases feedback potential. Instead, just send them a mix of a few key instruments for pitch and tempo.

Once again, start with fewer mics and add if you feel necessary. Less is MORE!

Gene Houck is the national sales manager and director of Christian artist relations for Audix Microphones, www.audixusa.com.  A worship leader for more than seven years, he recognizes the sonic challenges facing churches today and travels the country giving microphone clinics. 


Voice Broadcasting

©Copyright 2012 Religious Product News
Religious Product News